Blog
This is easier than you think…
Hi!
We want to thank you for your comments and feedback on our last post – it IS a really fun technique to play around with.
As you know, we’ve been designing quilts and publishing patterns for more than 10 years through our Online Quilt Magazines, and we decided it’s time to ramp it up now. We’re really looking forward to Christmas this year, and we wanted to share the fun with you, which is why we’re launching our Quilter’s Christmas Advent Calendar in just a few days (!), where we’ll send out a new Quilty treat each day through December in the countdown to Christmas. Opening your email will never be more exciting!
Each day through December, you can count down to Christmas with a surprise downloadable mystery pattern from our Quilter’s Christmas Advent Calendar, sent straight to your Inbox.
There will be a great range of projects including quilts, bags, Christmassy projects, and others suitable for gifts, and these projects are suitable for all skill levels to make. Each project has easy to understand instructions and lots of photos, and full-size templates are included if needed. Many of these patterns will be suitable for year-round use too, so you can build yourself a handy go-to pattern library for when you need gift ideas to make. Make your gifts memorable!
We promised to go through a quick binding tutorial today, so show you just how easy the invisible joining of your ends can be, so here goes:
Invisible Join Binding
Let’s start with perfect mitred corners.
We find a ¼ inch foot is such a help with most aspects of quilt-making, and we use it to add our binding too.
Make your binding as usual. We cut 2¼ inch strips, and join them with 45 degree seams.
Press in half lengthways with wrong sides together, and you’re good to go!
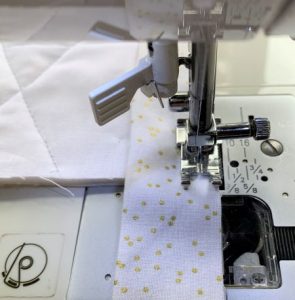
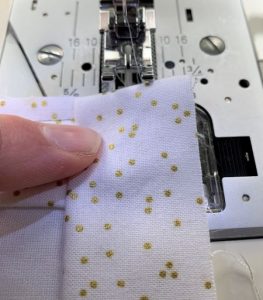
To start, leave a tail 8-10 inches long, and start sewing your binding on halfway along one side of your quilt.
(Have a quick check first to make sure that you’re not going to end up with a binding joining seam right on your corners too!)
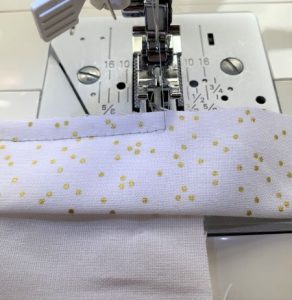
To mitre your corner, sew towards the corner as shown, and stop a ¼ inch before you reach the corner.
Leave the needle down, and pivot your quilt as pictured, so the binding runs across the top, and your next quilt edge is facing you.
Lift the needle in (no need to cut threads), and move the quilt slightly towards you.
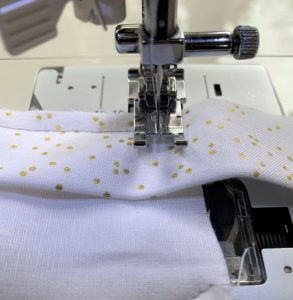
Fold the binding back on itself, making a 45 degree angle running up to the corner of your quilt.
Fold the binding back on itself, so the fold is underneath, and the binding should line up perfectly with your quilt corners.
If it overlaps the edge of your quilt, re-fold the binding, so it sits perfectly.
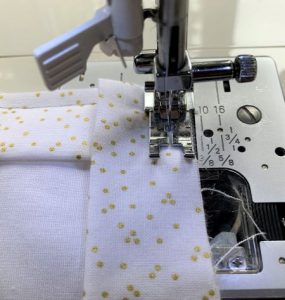
Start at the edge of the quilt, and continue sewing down the next side of the quilt with your ¼ inch seam.
Work your way around the quilt, mitring each corner as you go.
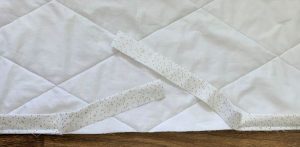
When you get near the beginning again, stop, and leave a reasonable gap as shown. You don’t want to leave too long a space, but you also don’t want to get too close to the start, so that it becomes tricky to move the quilt when you join the ends. Something like a 12 inch gap usually works pretty well. Leave a good binding tail.
The key to a perfect join is the amount of overlap you have with your binding ends.
The rule is that the binding needs to overlap by the width of the binding you cut. In our case, this is 2¼ inches.
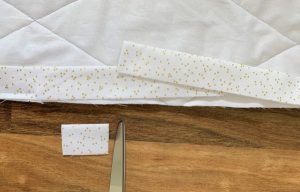
The easiest way to measure this is to cut a small piece of fabric off one end of the binding and use it to measure.

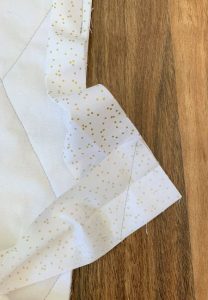
Lay the starting end of your binding tail so it is parallel to the quilt edge. (If your tail is too long and gets too close the end of the binding stitching, you can trim some off.)
Open out your cut binding piece and lay it on top of that end of the binding of your quilt, as pictured.
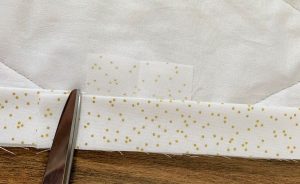
Overlap the end binding tail, and you can see now how long your overlap needs to be, using the small cut piece as a guide.
Tip – we usually stretch the binding slightly – not too much- as this ensures a snug fit when you sew it on at the end.
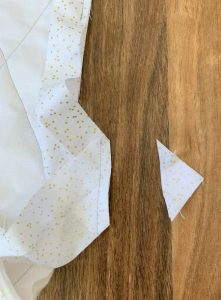
When you’re happy with the overlap, cut the excess off the end of the tail. Again, for the first few times, don’t be afraid to mark first and pin to make sure you have it right.
Your binding tails with correct length of overlap.
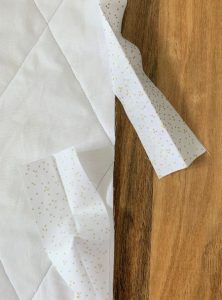
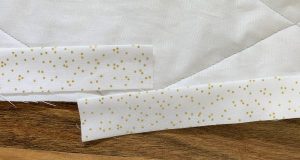
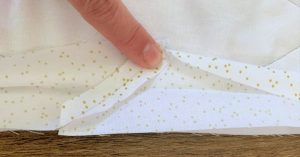
We usually find it easier to position the quilt as shown.
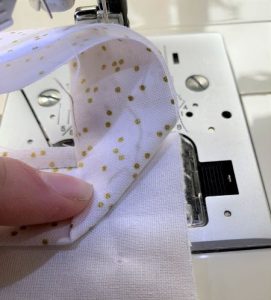
Open out the binding tails, so the top (end point) is wrong side down, and the bottom (start point) is open with wrong side up.
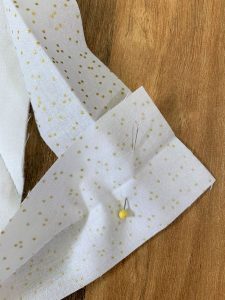
Overlap the ends as shown, so right sides are together. (This is the same way you join your binding strips originally.)
Pin, and check the fit against your quilt edge.
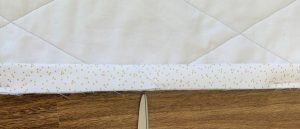
Sew at a 45 degree angle, diagonally from top to bottom as pictured.
Trim off the triangle points.
Open out and finger press the seam, with the seam open.
Re-fold in half, and your joined binding should sit perfectly against the quilt edge.
Sew the binding to the quilt, joining your start and finish points over your binding join to finish.
Note – we finish a lot of binding on quilts by machine. To do this, we sew the binding to the back of the quilt, then turn it over and neatly machine topstitch the folded binding edge down.
If you prefer to finish your bindings by hand, then make sure to sew it to the front of your quilt, so you can turn it and hand sew the binding down at the back.
These techniques we have shared with you this past week are just some of the many that you’ll find explained and shown in the range of patterns we have in our 2020 Quilter’s Christmas Advent Calendar. This is a carefully curated selection of 25 patterns, and will include full size quilts, wallhangings, bags, and much much more. You will be able to whip up all sorts of wonderful projects – either to keep for yourself, or to share as gifts with loved ones this Christmas.
Nothing shows your love quite like a handmade gift, and we know that these patterns will become cherished gifts for you and yours this Christmas. There’s stash busting quick ones for stocking stuffers or Hostess Gifts, and bigger, more detailed projects for you to enjoy as well, and we know you’re going to love opening your email each day to discover the new mystery pattern awaiting you.
Our Quilter’s Christmas Advent Calendar is new for this year, and we really hope you choose to celebrate Christmas in this way with us. We will be launching it very soon, and as Christmas IS coming, it’s only going to be available for a very limited time.
Keep an eye on your Inbox, and we’ll tell you all about it then! In the meantime, as always, please share any feedback or comments on this binding tutorial below.
Watch this space!
Best Regards,
