Reverse Quilting - Circles and Stripes Pillow Pattern - Quilt Pattern Library
Blog
Reverse Quilting – Circles and Stripes Pillow Pattern
Hi!
It turns out this is a 5th week for my April blog posts, so I thought I’d share this fun quilting technique with you, by way of an easy pillow pattern, so you can practice this quickly and easily. The technique I’m referring to is ‘reverse quilting’, or quilting from the back.
This is a great option for when you’re not sure how to quilt your quilt, or if you don’t want to mark motifs on it, but would just like to get it quilted easily with more of an all over design. This reverse quilting makes it super easy to quilt, with absolutely no marking!
Circles and Stripes Pillow Pattern
Take the guesswork out of quilting by quilting from the back and following the printed design of the backing fabric to quilt the front panel.
Our pillow cover measures approx. 16 x 16 inches square.
You Will Need:
1 metre / 1 yard plain white fabric for the background, and pillow back.
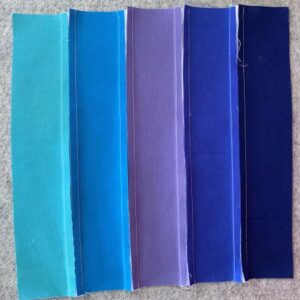
Small amounts of 5 different fabrics
17 inch square of batting
17 inch square of fabric with a fun printed design, that you can use as a quilting guide.
Piecing:
We pieced a simple modern design for the front of this pillow, so that we could reverse quilt a fun design on it from the back.
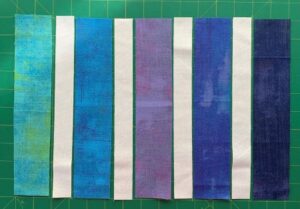
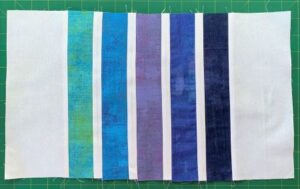
Cut 5 strips measuring 2 x 10 inches from your coloured fabrics. We chose cool colours in a graduated colourway, but you may like to use five the same colour, or make it scrappy if you’d prefer.
Also cut four strips measuring 1 x 10 inches from your white fabric.
Sew the strips together as shown above, and press seams towards the white strips.
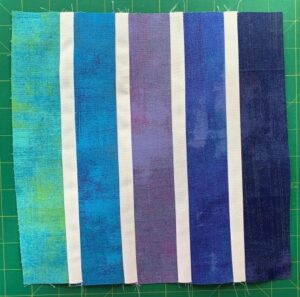
Your finished pieced panel.
Next add a thick white border.
From your white fabric, cut two strips measuring 4 x 10 inches and join them to either side.
Press.
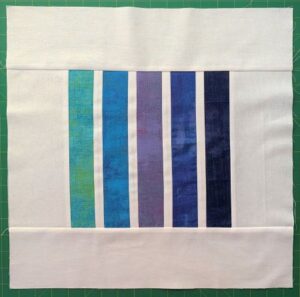
From your white fabric, cut two strips measuring 4 x 17 inches and sew to top and bottom to finish.
Press well.
Quilting:
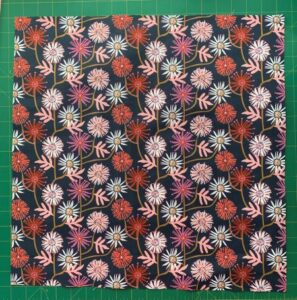
Find some fun printed fabric to use as a backing and quilting guide in one.
This reverse quilting technique makes your free motion quilting so easy, as you simply stitch from the backing side and follow the printed designs on the backing, to give a great quilted result on the front side.
Cut a square measuring 17 x 17 inches.

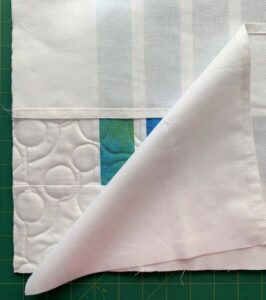
Layer your top with the batting and your backing square as shown.
Flip it over and pin baste to hold the layers together, and quilt from the back. (Especially with larger quilted projects – make sure to layer upside down! Put your top face down first, then the batting, and then the backing, right side up, and pin from that side.)

We used a white thread to match the front, and free motion quilted large circles around each flower, and we followed the stems to get between the flowers.
This was a quick and easy repeated pattern to follow, to quilt our pillow cover.
You will not see this fabric as it is inside the pillow, so find something with a design you’d like to have on your pillow front, and use it as a quilting guide. (You can have fun with this – get creative with your backing fabric choice and ‘wow’ yourself with the finished result!)
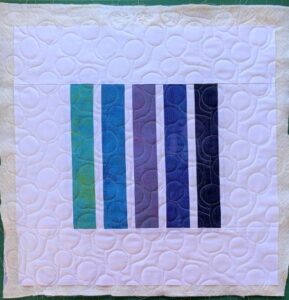
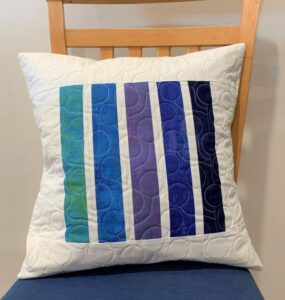
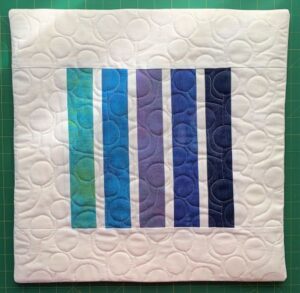
And Ta Dah!!! The quilted front of my pillow.

I really liked the contrast between the simple pieced stripes, and the softer quilted circles and ‘stems’.
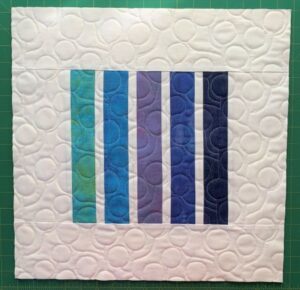
Trim the quilted front to measure 16½ x 16½ inches square.
Finishing:
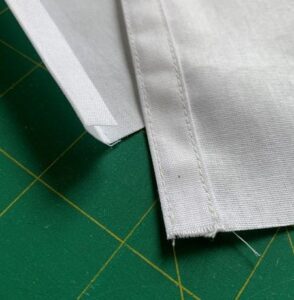
From your white fabric, cut two rectangles measuring 16½ inches x 12 ½ inches for the pillow back.
Use your iron and fold up a ¼ inch hem along one of the long sides on each panel. Fold over again and press well.
Topstitch to finish as pictured.
Lay your quilted panel face up on a flat surface.
Lay one backing panel on top, face down, and line up the top and side raw edges.
Place a second panel on top of that, face down again and so that the bottom and side raw edges are aligned.
Pin and sew around all four sides.
Trim the corners. Turn right sides out and press to neaten the edges.
Stuff with your pillow insert and your reverse quilted pillow is ready to display proudly in your home!
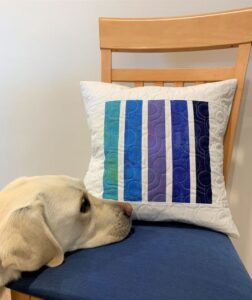
(My helper liked this one! 🙂 )
I hope you do too!! Let me know what you think of this fun technique, or if you’ve tried it already.
Enjoy your week!

4 Comments
Leave a Reply

Welcome to our Quilt Pattern Library Blog
Read through to discover Hints and Tips, How To’s, Patterns and more!
Please enter your email address in the box below to receive notification of new posts by email.
Great idea! Never tried it before
Thank you
Thanks Jody for the great idea…..why diidnt I ever think if that❤️- Margaret, langley BC, Canada
I am going to try it. Never quite know what to do for free motion quilting. This is a great idea!
Wow, this reverse quilting idea is stunning! I absolutely love it. Thanks for sharing.