Christmas Folded Fabric Ornament Pattern - Quilt Pattern Library
Blog
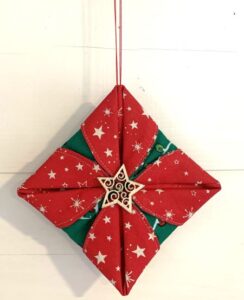
Christmas Folded Fabric Ornament Pattern
Hi!
I hope you’ve had a great week this week. As it’s still July, and we’ve been doing our Christmas in July launch for this year’s Quilter’s Advent Calendar program, I thought it would be fun to share this Folded Fabric Ornament for you to make.
If you haven’t checked it out yet, our Advent Calendar program is just for quilters, and has been carefully curated with you in mind. Join us as we count down to Christmas together, with a daily email and surprise pattern from the 1st through the 25th December. There’s a range of projects including full size quilts, runners, bags and more. Some are Christmassy, and others for making as gifts, and they’re suitable for everyone, from confident beginners right through.
For more info (and to check out the Bonuses), go to: 
Once you’ve done that, grab a couple of suitable scraps, and let’s get making!
You Will Need:
Small amounts of two different fabrics
A button or other decoration
Needle and threads – one thread for sewing together, and a thicker thread/yarn for the hanging loop
Our ornament measures approx. 3 ½ inches square.
To Make:

You will need two squares of fabric to make this decoration.
We used 8 inch squares for ours.
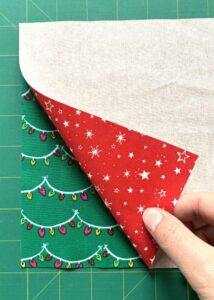
Place the squares with right sides together, and all edges aligned.
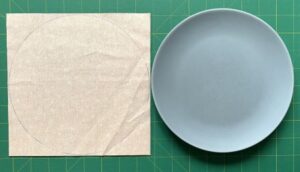
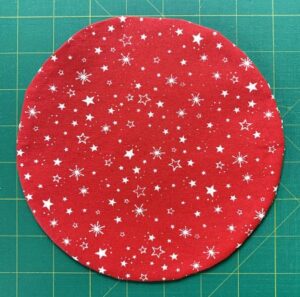
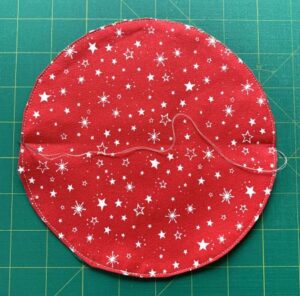
Trace a circle onto the wrong side of the fabric as shown.
Find what fits – if you have a round template, great. If not, find a bread and butter plate or bowl to use as a template instead.

Cut out your circles, keeping the fabric layers together.
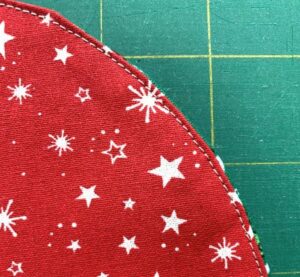
Sew around the edge with a ¼ inch seam, and making sure to leave a 3-4 inch gap, to turn your fabric through.
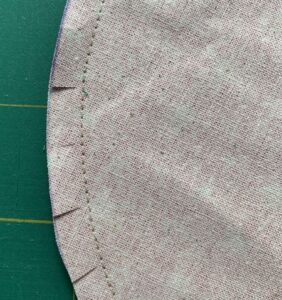
Before turning, carefully clip the seam allowance – up to, but not through the stitched seam.
This helps it turn and sit more smoothly.
Turn right sides out and press well, making sure the seam is right on the edge.
Tuck in the seam allowances at the gap and pin it closed to complete the circle.
Press.
Topstitch around the circle to close the gap and neaten the edge.
Now to get making!
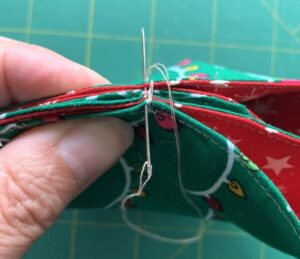
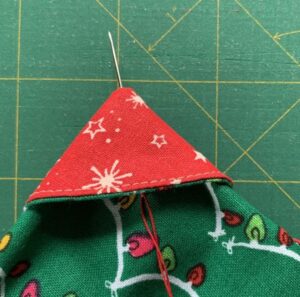
Fold your circle in half like a taco. Finger press the folds at the edges.
With your needle and thread (we used a doubled thread for ours), make a knot or stitch a small backstitch to secure the end then bring the needle through the very edge of the circle, at the folded point, as pictured.
Use a good length thread too, and you can do the hand sewing all in the one go.
Open out your circle, and bring the needle through the opposite halfway point.
Draw the two halfway points together and take a couple of small stitches over the top to hold the points together.

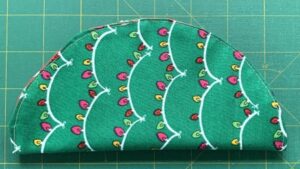
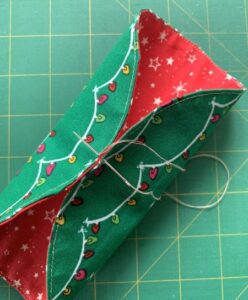
Now fold in half again, the opposite way, with your stitched points at the top of the semicircle arc.
Bring your needle down, and again, go through the outer edge of the fabric (from the outside to the inside as shown), at the fold.
And as you did before, bring the needle through the opposite halfway point on the circle.
Bring those points together (you’ll have the first stitched points in the middle), and take a few stitches over the top to hold them together.
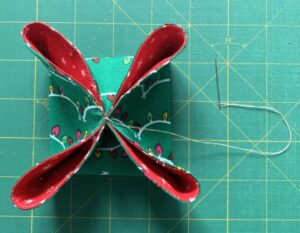
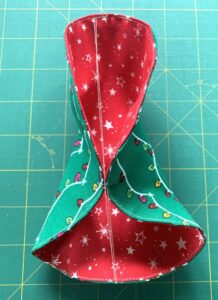
Your circle, with the halfway points sewn together.
Leave the needle and thread attached, and just work around them for the next step.
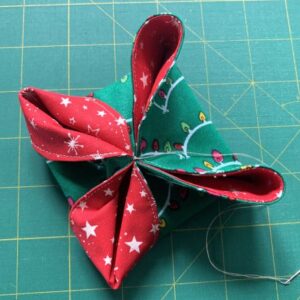
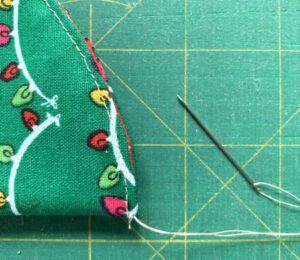
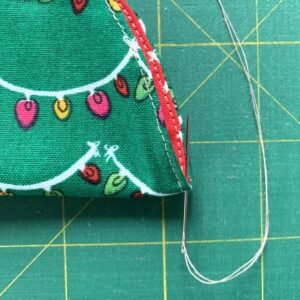
Now fold back the points as pictured.
You will find that you need to adjust them as you go to try and get an even square base.
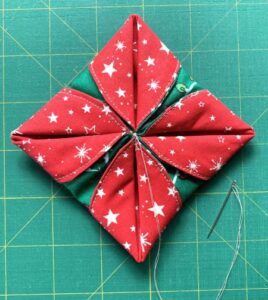
The four points folded back neatly, so they make a square shape for this ornament.
Use your needle and thread to sew on a small decorative ‘button’.
You could use a button, or a pom pom, or even a piece of braid! It’s just to cover the middle and give your ornament a finished look.
The final step is to add your hanging loop.
Grab some thread, yarn or cord, as you like.
(We used a doubled strand of perle cotton for ours.)
Bring the needle up from the back, through the top of one of the points, as shown.
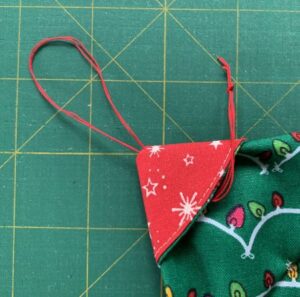
Go back down again a short distance from where you came up, and bring the ends together in a knot, as pictured.
Tie the ends securely, then pull the loop up to hide the knot under the folded point, and you’re done!
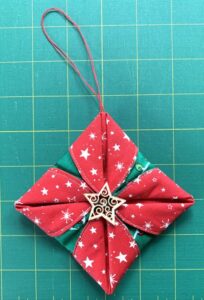
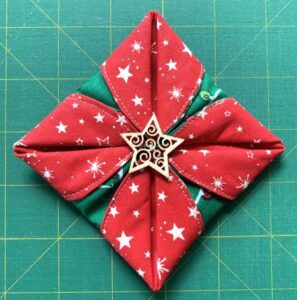
Ta dah!!
One finished decoration, ready for your tree or mantel.
These are fairly quick and easy to make, so have a play and make some more for small gifts or for your tree.
Happy (Early) Christmas!!
Speaking of Early… This year’s Quilter’s Advent Calendar Earlybirds Sale is finishing tomorrow, so if you’d like to take advantage of a hefty discount, Plus our exclusive “12 Days of (Early) Christmas” Extra Bonus, you know where to go!! 🙂
Enjoy your week!

3 Comments
Leave a Reply

Welcome to our Quilt Pattern Library Blog
Read through to discover Hints and Tips, How To’s, Patterns and more!
Please enter your email address in the box below to receive notification of new posts by email.
Such a cute ornament – thank you! I’ve made the folded star ones on a styrofoam ball but I think this is cuter.
Love this and can’t wait to try it.
Thank you.
lovely idea